Hi there! My name is Emily and I am excited to share my experiences and thoughts on the world of DevOps and tech through this blog. With over a decade of experience in the tech industry and specifically in DevOps since 2018, I have a lot to share about this ever-evolving field. When I’m not working, I love to singing Barbershop, playing complicated board games and all things cats. I have two cats (Puppy and Cation), a foster cat, and I also volunteer doing Trap Neuter Return. I live in Rhode Island. I’m the organizer of https://www.meetup.com/rhode-island-codes/ and I’m excited to connect with readers from all over and build a community centered around all things DevOps.
Pycharm does not inherit your PATH on Mac
Getting pre-commit hooks (https://pre-commit.com/) working on Pycharm was more trouble than I had expected.
10:19:00.320: [aws-global-tofu] git -c core.quotepath=false -c log.showSignature=false commit -F /private/var/folders/yn/45720mbn22nf5yc2mzz1lfy00000gn/T/git-commit-msg-.txt --
OpenTofu fmt.............................................................Failed
- hook id: tofu_fmt
- exit code: 127
/Users/emilyzall/.cache/pre-commit/repoikdmwqn_/hooks/tofu_fmt.sh: line 47: tofu: command not found
Eventually I realized it is because when you launch Pycharm on a Mac it doesn’t inherit your PATH unless you launch it from the terminal. You can see this by making a file to show the PATH and then right-clicking the file name and choosing Run then compare that to echo $PATH from your terminal.
# show_path.py
import os
print(os.environ.get("PATH"))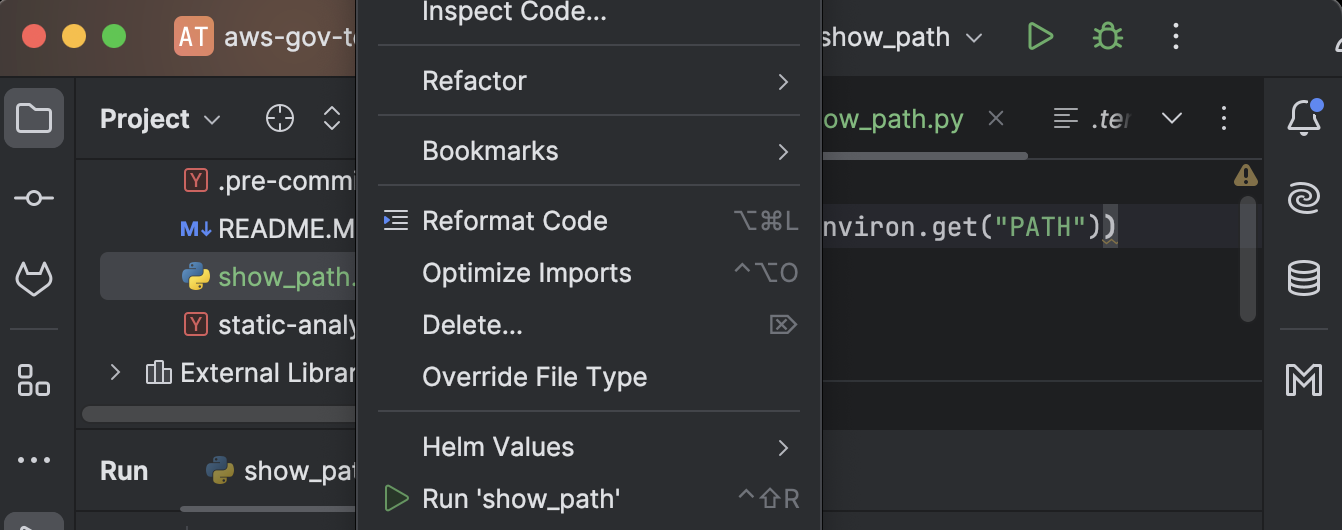
/usr/bin/python3 /Users/emilyzall/repos/aws-gov-test/show_path.py
/usr/bin:/bin:/usr/sbin:/sbin

➜ echo $PATH
<<way more stuff>>
So I launched it from the terminal with open -a "PyCharm"and it inherits my path and all worked fine.
There is probably a way to make this work from the Mac launcher but my brief research didn’t find way to set the PATH from Pycharm and it doesn’t seem to inherit the launchctl path launchctl getenv PATH. I also saw a suggestion to “create a LaunchAgent Plist” to solve this but I am not really familiar with this and decided not to mess with this for now.
Terragrunt – DRY wrapper for Terraform
Why Terragrunt?
The biggest reason is DRY (Don’t Repeat Yourself). Using Terraform modules is a critical first step toward DRY but without Terragrunt even the code to instantiate a module and set up input variables, output variables, providers, and remote state can still create a lot of maintenance overhead.
Another powerful functionality – is that you can add hooks to run certain commands with the terraform apply, before, after, or on error.
Who is in charge and what’s the revenue model?
Terragrunt is an open-source project maintained by Gruntwork. They are in charge of its development and maintenance.
Gruntwork’s revenue model involves offering support, consulting, and services around their tools, including Terragrunt and other infrastructure-related offerings. They provide paid subscriptions for enterprise support, training, and helping companies with infrastructure-as-code (IaC) implementations, while the core tools remain open-source.
How do I keep it DRY?
In the module repo(s), expose anything you want to be able to set as a terraform variable.
Have another repo with all your environment settings. Let’s call this repo live, pass those input parameters.
The source of the terraform module and the inputs are the only things you need to set per environment.
terraform {
  # Deploy version v0.0.3 in stage
  source = "git::git@github.com:foo/modules.git//app?ref=v0.0.3"
}

inputs = {
  instance_count = 3
  instance_type  = "t2.micro"
}
(Note: the double slash (//) in the source parameter is intentional and required. It’s part of OpenTofu/Terraform’s Git syntax for module sources. OpenTofu/Terraform may display a “OpenTofu/Terraform initialized in an empty directory” warning, but you can safely ignore it.)
Terragrunt Generate
Where possible the easiest way to customize your module by environment is by passing input parameters to variables. However, sometimes this is not an option if you are using a module that you do not control and in that case you can still use a Terragrunt generate block to add Terraform resources into the downloaded module.
DRY State Management
Without Terragrunt – copy and paste this everywhere but change the key on each one. Also you have a bootstrapping problem. How do you create the s3 bucket to store terraform state? Where is the state for that going to be stored.
terraform {
  backend "s3" {
    bucket         = "my-terraform-state"
    key            = "frontend-app/terraform.tfstate"
    region         = "us-east-1"
    encrypt        = true
    dynamodb_table = "my-lock-table"
  }
}
With Terragrunt – define once in the top-level (root) of each environment and for each module automatically match the key to the filepath. And you won’t have a bootstrapping problem. Terragrunt by default will automatically create the state bucket with all the recommended security settings.
# in the root
generate "provider" {
  path = "provider.tf"
  if_exists = "overwrite_terragrunt"
  contents = <<EOF
provider "aws" {
  assume_role {
    role_arn = "arn:aws:iam::0123456789:role/terragrunt"
  }
}
EOF
}

# in the module invocation
include "root" {
  path = find_in_parent_folders()
}
Terraform – Best Practices and Tools
I posted Terraform Intro and Key Concepts previously in this series and now I want to talk briefly about Terraform best practices and tools.
Best Practices:
Use Modules: Write reusable and modular code. Keep resource definitions simple by organizing common components into modules.
State Management: Use remote backends (like S3 with locking via DynamoDB) to store state securely and avoid conflicts when working in teams.
Version Control: Pin Terraform and provider versions in your code to avoid unintentional upgrades.
Use Workspaces for Environments: Isolate environments (e.g., dev, prod) using workspaces or separate state files to avoid accidental changes across them.
Plan Before Apply: Always view the terraform plan before applying changes to preview what will happen and catch potential issues early. You can run the terraform plan command but also terraform apply will show you a plan followed by an interactive prompt by default. You could avoid this interactive prompt by running terraform apply -auto-approve.
Tagging Resources: Always tag your resources with metadata like environment, owner, or purpose to improve tracking and management.
Automated Testing: Implement testing using tools like Terratest to verify your Terraform configurations.
Sensitive Data: Avoid hardcoding sensitive information in your Terraform code. Instead, use external tools like Vault or cloud-native secret managers.
Drift Management: You want to minimize drift – keep your environment as up-to-date with your Terraform code as possible. This means infrastructure managed by Terraform should not be updated by other means unless it cannot be avoided. And when you change Terraform code you should run a terraform plan and terraform apply as soon as possible so that your environments will match your Terraform code.
Tools to consider
I have only personally used Terragrunt and tflint but I have heard some of these others can be useful as well and all of them are actively maintained in 2024 and have at least some features available on a free, open source basis.
Terragrunt: A wrapper for Terraform that simplifies managing multiple environments and modules. It helps with DRY principles and managing state files.
tflint: A linter for Terraform that checks for errors and warns about best practices.
Terratest: validate that the infrastructure works correctly in that environment by making HTTP requests, API calls, SSH connections, etc
terraform-docs: Generates documentation for your Terraform modules, ensuring they’re well-documented.
infracost: Provides cost estimates for your infrastructure before applying changes, helping you understand and optimize costs.
Terrascan: Scans Terraform code for security vulnerabilities and policy violations.
Atlantis: Automates Terraform workflows via pull requests, making team collaboration easier.
tfsec: A static analysis tool to find security issues in your Terraform code.
Checkov: An infrastructure-as-code scanner that detects potential security misconfigurations.
Terraform Intro and Key Concepts
Terraform is an Infrastructure as Code (IaC) tool that allows you to define, provision, and manage infrastructure using a declarative configuration language. Terraform can help automate the setup and management of resources across various cloud providers (like AWS, Azure, and GCP), making infrastructure management repeatable and scalable.
Key concepts:
- Providers: Plugins that let Terraform manage different platforms (e.g., AWS, Azure, Kubernetes).
- Resources: The building blocks (e.g., VMs, storage buckets, load balancers) defined in the configuration files.
- State: Terraform keeps track of resources it creates in a state file, which helps manage infrastructure changes.
- Modules: Reusable pieces of infrastructure (e.g., a complete VPC setup) that can be shared and reused.
- Plan & Apply: The
terraform plancommand shows what will change, whileterraform applyimplements those changes. - Variables: Allow for parameterizing configurations to make modules and resources more flexible.
- Outputs: These allow you to extract values from your Terraform configuration that can be used elsewhere in the system or passed to other Terraform configurations.
- Workspaces: A way to manage multiple environments (e.g., dev, staging, prod) within the same configuration. Each workspace has its own state file, allowing you to use the same code across environments with different parameters.
- Provisioners: These are used to execute scripts or commands on resources after they have been created. While not recommended for most use cases (since Terraform focuses on declarative state), they can be helpful for certain tasks like bootstrapping instances.
- Locking: Terraform uses a state locking mechanism (usually through the backend, such as S3 for AWS) to prevent simultaneous modifications to infrastructure from different users or automated systems.
- Backends: These define where your Terraform state is stored (e.g., locally, in an S3 bucket, or using a remote state service). Storing state remotely is key for collaboration in teams.
- Data Sources: These allow you to fetch or reference existing resources outside of your Terraform configuration. This is useful when you need to manage infrastructure alongside pre-existing components or share resources between configurations.
- Lifecycle Management: With lifecycle rules, you can control how Terraform manages resources over time. For instance, you can set dependencies between resources, manage how resources are created, updated, or destroyed, or prevent a resource from being accidentally destroyed.
Should I use Crossplane instead of Terraform?
Choosing Between Terraform and Crossplane for Infrastructure Management in Kubernetes
When it comes to infrastructure as code (IAC), there are two popular tools to consider if you’re using Kubernetes: Terraform and Crossplane. Both have their strengths, but which one is right for your use case? Having worked with both, here are my insights on making this decision.
Crossplane: Kubernetes-Native with Continuous Reconciliation
Crossplane is a relatively new IAC tool (introduced in 2019) and is designed specifically for Kubernetes. Everything in Crossplane is treated as a Kubernetes resource, meaning that infrastructure is continuously reconciled by Kubernetes controllers. This makes Crossplane a great option if you’re aiming for a Kubernetes-native approach to managing infrastructure.
Despite being newer and less established than Terraform, Crossplane has a strong and growing community. The ecosystem around Crossplane continues to expand, offering providers for major cloud platforms. It also integrates seamlessly with GitOps tools like Flux CD or Argo CD, making it a strong choice if you’re already using GitOps practices.
However, as with any emerging technology, there are risks. Some of the cloud providers may not be as mature as Terraform’s offerings, and troubleshooting can be more challenging. But in my experience, the community has been incredibly supportive, and new features are consistently improving the overall user experience.
Terraform: A Stable, Proven Solution
Terraform is the more established and widely used IAC tool. It’s stable and has extensive support across the cloud ecosystem. If you’re looking for a battle-tested solution, Terraform is a safe bet. Many large organizations rely on Terraform, and it has a vast library of providers, so issues tend to get resolved quickly.
One downside is that Terraform isn’t Kubernetes-native, so you’ll need to manage infrastructure outside of your Kubernetes cluster. You’ll also need to set up scripts and pipelines to trigger reconciliation processes manually, unlike Crossplane’s continuous reconciliation. That said, these are not dealbreakers, and Terraform’s reliability makes it a strong contender for most infrastructure needs.
Conclusion: Terraform or Crossplane?
Both tools have their place depending on your goals. If you’re heavily invested in Kubernetes and want everything managed as a Kubernetes resource, Crossplane offers a compelling solution. If you prefer a more established, stable option with wider support, Terraform remains a solid choice.
Ultimately, your decision should be based on your team’s expertise and your long-term infrastructure strategy.
What are the different HTTP API authentication methods?
I think this is worth a post because there is some info out there but in many cases it assumes a lot of background knowledge and the terminology is fuzzy.
Authentication (AuthN) vs. Authorization (AuthZ)
I refer to them by these abbreviated forms because I think that makes them easier to distinguish. It’s AuthN because authentication has the letter ‘n’ in it. And AuthZ because authorization has a ‘z’ in it.
In simple terms, AuthN is the process of verifying who a user is, while AuthZ is the process of verifying what they have access to.
While AuthN and AuthZ are different, it can be hard to keep them distinct in practice. Many sources use them interchangeably and inaccurately. The authentication is what (usually along with application logic and data) determines what the entity is authorized to do. To add to the confusion, the AuthN scheme is usually passed as auth-scheme to the Authorization http header with parameters referred to as authorization-parameters.
Authorization: <auth-scheme> <authorization-parameters>Basic authentication example (credentials, encoded according to the specified scheme)
Authorization: Basic <credentials>Most Used API Authentication Methods
These are all for http/https requests. Use of https is recommended.
In all but token authentication, AuthZ will be handled by the application looking up the permissions associated with the credentials used for AuthN. Only for token authentication, there is an option to pass permissions (scope) as part of the credentials (token) itself.
The values for most methods need to be passed in the Authorization header of the http request. But for API keys it is most common to use the x-api-key header and there are several other possibilities.
Which method should you choose?
Basic AuthN is easiest to use and least secure followed by API keys then Digest AuthN. Token authentication is most secure because the tokens are encrypted and will expire. If you want to enable SSO, Oauth is a good type of token authentication to choose.
Basic Authentication
Passes an encoded username and password with each request in the Authorization header. Encoding is usually base64. Not very secure.
Digest Authentication
Also passes an name and password in the Authorization header but more secure than basic because it uses MD5 cryptographic hashing to encrypt your password/access_token and a nonce value to stop replay attack.
GET /api/v0/tags HTTP/1.1
Host: gimmebar.com
User-Agent: Mozilla/5.0 (Macintosh; U; Intel Mac OS X 10_6_7; en-us) AppleWebKit/533.6+ (KHTML, like Gecko) Version/4.0 Safari/528.16 Titanium/1.1.0
Accept: */*
Accept-Language: en-us
Accept-Encoding: gzip, deflate
Authorization: Digest username="funkatron", realm="GimmeBarAPI", nonce="7a3ab1f9cde605f27797cd04c4d1fcf6", uri="/api/v0/tags", response="3654f9b1b2ba9489e1f01ae792852987", opaque="94619f8a70068b2591c2eed622525b0e", algorithm="MD5", cnonce="6897ccbff3b08776ab61e69a814c05b4", nc=00000001, qop="auth"
Connection: keep-alive
Token Authentication aka bearer token
Set the Authorization header in the http request like so:
Authorization: Bearer <token>
If you have (bear) the token, you can get the appropriate access to the API.
The token is a string that represents the user’s identity and permissions e.g. scope. You don’t have to pass a scope. You can also implement your app to use the token to look up proper permissions. You can combine passing scopes and doing permission lookup in the app.
This is more secure because the token is encrypted and has a limited lifespan you can configure.
OAuth authentication
OAuth is an open authorization framework that uses a type of token authentication, but it leverages credentials from one service provider to provide SSO (Single sign-on) access to other service providers.
API key authentication
API keys can be used for authentication and authorization. They do not expire which creates some security risk.
There are several places where API keys can be passed in a HTTP request.
The most popular API key location for modern APIs is in headers.
x-api-key
The most popular choice for including API keys in headers, perhaps due to its usage by AWS API Gateway, `x-api-key` is a custom header convention for passing your API key.
GET / HTTP/1.1
Host: example.com
X-API-KEY:  abcdef12345
API key passing via Basic Authentication
You can pass the API key via Basic Auth as either the username or password. Most implementations pair the API key with a blank value for the unused field (username or password).
GET / HTTP/1.1
Host: example.com
Authorization: Basic bWFnZ2llOnN1bW1lcnM=
You will need to base64-encode the `username:password` content, but most request libraries do this for you.
API key passing via Bearer Authentication
Some APIs use the `Authorization` header to handle the API key, usually with the Bearer keyword. This method is also used for other tokens, such as those generated by OAuth.
The client must send this token in the `Authorization` header when making requests to protected resources:
Authorization: Bearer abcdef12345Non-header API Key Locations
Though the header has become the preferred location for API keys, there are non-header methods still used by many APIs.
API Key in Query String
A popular method for early APIs, passing an API key through a query string in a URL is certainly easy. However, this method can risk API key exposure since, despite encryption, the parameters can be stored in web server logs.
curl -X GET "https://example.com/endpoint/?api_key=abcdef12345"If you use the query string method, you’ll want to make sure that there’s a low risk of the API key being shared.
API key in Request Body Parameter
Another method seen, especially in older APIs, is to pass an API key in the POST body as JSON:
curl -X POST
	`https://example.com/endpoint/’
	-H ‘content-type: application/json’
	-d ‘ {
		“api_key”: abcdef12345”
	}’
The most significant drawback to this method is that authentication is mixed in with other data.
Sources
https://konghq.com/blog/engineering/api-authentication-vs-api-authorization
https://developer.mozilla.org/en-US/docs/Web/HTTP/Headers/Authorization
https://stackoverflow.com/questions/8483717/digest-basic-and-bearer-authentication
https://blog.stoplight.io/api-keys-best-practices-to-authenticate-apis
Tidy First?
I recently read and very much enjoyed https://www.oreilly.com/library/view/tidy-first/9781098151232/. The title refers to whether it’s a good idea to tidy the code a little bit before you work on implementing a new behavior. He basically concludes that it is usually worth taking a little time (minutes to 1 hour) to tidy so long as you are making very safe changes and do them in a separate Merge Request. It may make your task go quicker and will also increase satisfaction in your work and facilitate future work while the context is fresh in mind. His writing style is fun too, he describes tidying as “cute, fuzzy little refactorings that nobody could possibly hate on”. And he explains the different tidyings you could do – starting with simple things like useful comments and line breaks between sections.

ChatGPT: do not trust but do verify
As a DevOps Engineer I know not to trust ChatGPT, always fact check and make sure it makes sense. But with that major caveat I still find it a very helpful tool in many scenarios.
Here’s some things I like to ask it to do:
- Explain a concept
- Give me troubleshooting ideas
- Summarize a long document (especially yaml/kubernetes
- Answer a question I have about a specific document. Including, but not limited to, you can give it a long yaml file and ask it to tell you what a certain field is nested under. But now that I have a yaml plugin for my IDE, that’s an easier way to see that. I may write a post on Jetbrains plugins too.
- Evaluate my work to provide any suggestions
- Improve my documentation
- Identify issues with Kubernetes resources and yaml files. It doesn’t always work but you can copy it in and ask what’s wrong with it. It’s the most intelligent diff tool I’ve seen, it will compare your resource to known examples and attempt to not just show you every difference but to use context to see which of the differences are relevant. You can give it a specific document to refer to or let it use everything in its corpus.
- Variable naming. If it’s a challenging one, you can explain what the variable does and get suggestions. I found the suggested names were descriptive yet fairly concise and I like how it explained the reasoning behind them.
- Ask it for reassurance when you’re feeling discouraged! ^_^
- Just for fun. Behold the Dapr Kafka ^
Commenting values.yaml in a helm chart
Helm charts are supposed to give you an easy way to install a set of kubernetes resources. In theory you just choose the chart you want to install, pass your variables and away you go. In practice there is usually a lot of different configuration values and some are not intuitive or explained so you end up having to dig through the templates to figure out what configuration you need.
When developing a helm chart myself I want the values to have descriptive self-explanatory names and if the name doesn’t say it all, then document it. The helm charts I’ve worked on are not public but here is an example of what you could do with commenting a values.yaml file: https://github.com/concourse/concourse-chart/blob/master/values.yaml. You won’t necessarily want to go quite this verbose but I think this is a useful example of the kind of information users want to know and how you can format it. For example – how do you indicate what values are acceptable if this is not self-evident?
Crossplane Resource Types In a Nutshell
I think the way Crossplane explains this could be clearer.
CompositeResourceDefinition (XRD, related but not exactly the same as a CRD) – this is like the interface for a function that defines the parameters, their types and which are required.
apiVersion: apiextensions.crossplane.io/v1
kind: CompositeResourceDefinition
metadata:
  name: xglobal-vault-accesses.azure.simbachain.com
spec:
  group: azure.simbachain.com
  # for the CompositeResource XR, the actual resource created by the claim
  names:
    kind: XGlobal-Vault-Access
    plural: xglobal-vault-accesses
  claimNames:
    kind: Global-Vault-Access
    plural: global-vault-accesses
  versions:
    - name: v1beta1
      served: true
      referenceable: true
      schema:
        openAPIV3Schema:
<<snip>>
Composition – this is like the internal implementation code of the function, note however that there can be more than one implementation of a given function with labels used to distinguish them.
apiVersion: apiextensions.crossplane.io/v1
kind: Composition
metadata:
  name: global-vault-access
  labels:
    crossplane.io/xrd: xglobal-vault-accesses.azure.simbachain.com
    provider: azure
spec:
  compositeTypeRef:
    apiVersion: azure.simbachain.com/v1beta1
    kind: XGlobal-Vault-Access
  resources:
<<snip>>
Claim – this is a request like the invocation of the function, you pass in your parameters. Note: the kind is not Claim, it will be whatever was under claimNames > kind. The word Claim generally does not appear anywhere, you can add it to a comment if that helps
# below is a crossplane claim that requests an instance of XGlobal-Vault-Access and its managed resources
---
apiVersion: azure.simbachain.com/v1beta1
kind: Global-Vault-Access
metadata:
  annotations:
    crossplane.io/external-name: blocks-simba-kongtest
  # will be used to generate names for the resources in the composition
  name: blocks-simba-kongtest
  namespace: blocks-simba-kongtest
spec:
  compositionRef:
    name: global-vault-access
  parameters:
    location: eastus
<<snip>>
CompositeResource (XR) – Sometimes this is talked about as if it’s the same as the claim but it’s a separate Kubernetes resource and it’s important to differentiate them. This results from the resources above instead of being defined directly. You define an XRD, make a Composition that defines the internal implementation of that XRD, make a claim that passes parameters then a CompositeResource will be created automatically. When I am troubleshooting this is the first place I want to look because it will has Synced and Ready status and contains resource refs to all the individual resources. Note: the kind is not CompositeResource, it will be whatever was under names > kind. It is traditionally named starting with X in the XRD.
kubectl describe xGlobal-Vault-Access